
Introduction
After procrastinating for a long time about running LLMs locally, I finally decided to give it a try, and I chose Ollama to do it. In this post, I’ll share my experience of running these models on a MacBook Air M1 (8GB RAM). Additionally, I also tested them on a Ryzen 5650U Linux machine (40GB RAM). Feel free to reach out if you have any questions about my experience with the Ryzen setup as well!
What is Ollama
Ollama is a tool that lets you run AI models on your computer without needing an internet connection. You can run the models in REPL mode where you can directly interact with the model or connect to the models using code by making a request to Ollama API which is exposed on a specific port(11434).
Why should I run a model on my local
Running a model on your own computer keeps your data safe and private because nothing is sent to the internet or shared with other servers. This means you have full control over your information, which is especially important for things like personal projects, work files, or sensitive data like health or financial details. It also helps you avoid risks like hacking or data leaks. Using a local model doesn’t need an internet connection, so it’s faster and more secure. For anyone who values privacy and wants to keep their data safe, running models locally is the best and most secure choice.
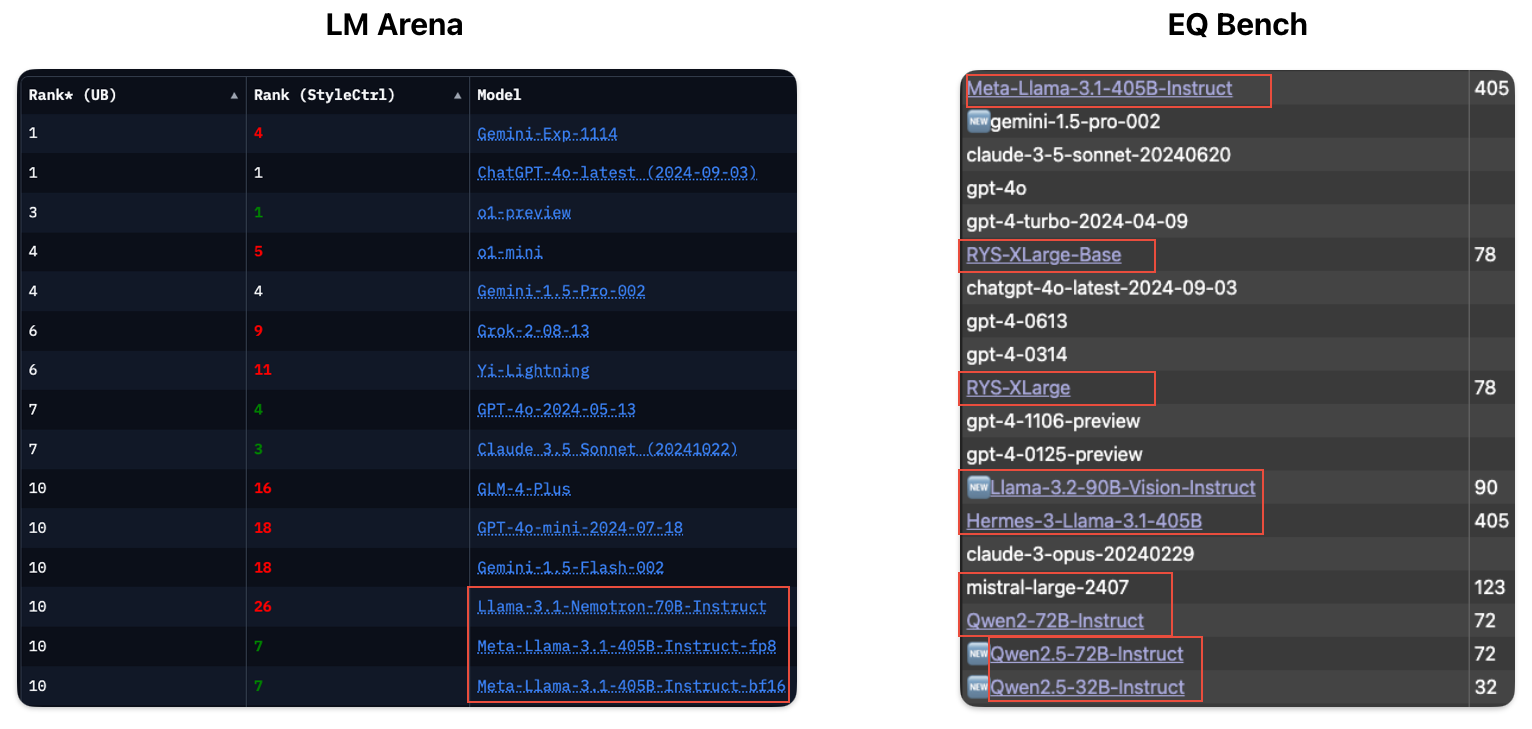
On top of that, running local models is free once you set them up, so you don’t have to worry about paying monthly fees or extra charges. What’s even better is that local models have improved a lot over the past year. Many of them are now as good as, or even better than, closed models when it comes to accuracy, speed, and flexibility.
Target for this Post
We use Ollama to run the 3b and 8b versions of Llama, which are open-weight models (not open-source) released by Meta. When it comes to running these models, there are plenty of options available. I tried many of them but settled on these versions because of my hardware and use case requirements:
• Hardware: MacBook Air M1 (8GB RAM)
• Use Case: Long context length and good summarization capabilities
I found that Llama 3.2 (3b) and Llama 3.1 (8b) were able to meet these requirements perfectly. With this target in mind, let’s get started!
Ollama Installation
Head over to the Ollama website, click on the Download button to get the .dmg file, and install it on your system. Once installed, you’re ready to go! After installation, open the Terminal app and type the following command to see the various commands available with Ollama:
(genericPython) madhavarora@Air genericPython % ollama -h
Large language model runner

Usage:
  ollama [flags]
  ollama [command]

Available Commands:
  serve       Start ollama
  create      Create a model from a Modelfile
  show        Show information for a model
  run         Run a model
  stop        Stop a running model
  pull        Pull a model from a registry
  push        Push a model to a registry
  list        List models
  ps          List running models
  cp          Copy a model
  rm          Remove a model
  help        Help about any command
Ollama Commands
Getting a model and running it:
ollama run <model-name>
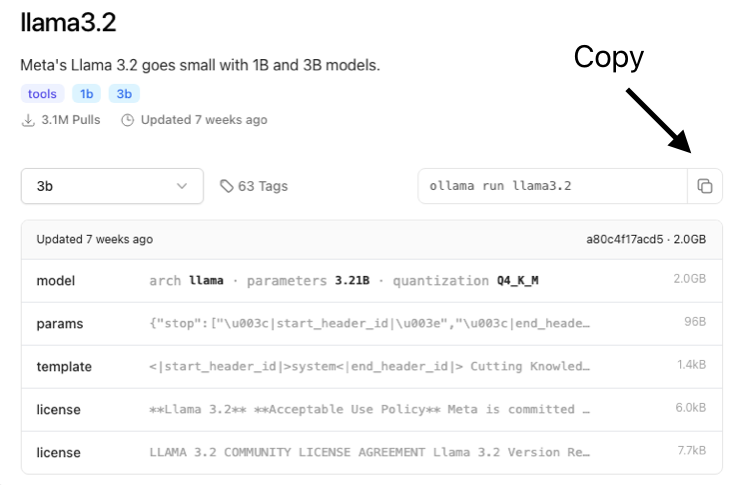
Get the model name from the Ollama model search, which lists all the available models for download. Once you’ve selected a model, click on its tile to go to the model’s page. From there, click the Copy button to copy the command for downloading and running the specific version of the model (more on versions later). Paste this command into your terminal and run it to start the model. This will launch the model in REPL mode, allowing you to interact with it directly in the terminal. It’s a quick and straightforward way to get started!

If you just want to download a model without running it immediately, you can use the following command:
ollama pull <model-name>
To stop an already running model:
ollama stop <model-name>
To see the models installed on local:
ollama ls
For getting the list of models currently running:
ollama ps
Which Version of a model to Download
I think this is really important. When I started experimenting with different models, I noticed that my results weren’t as good compared to others running similar experiments with the same models. After digging deeper, I realized that the model versions play a big role in impacting both the speed and accuracy of the results.
How to get different versions
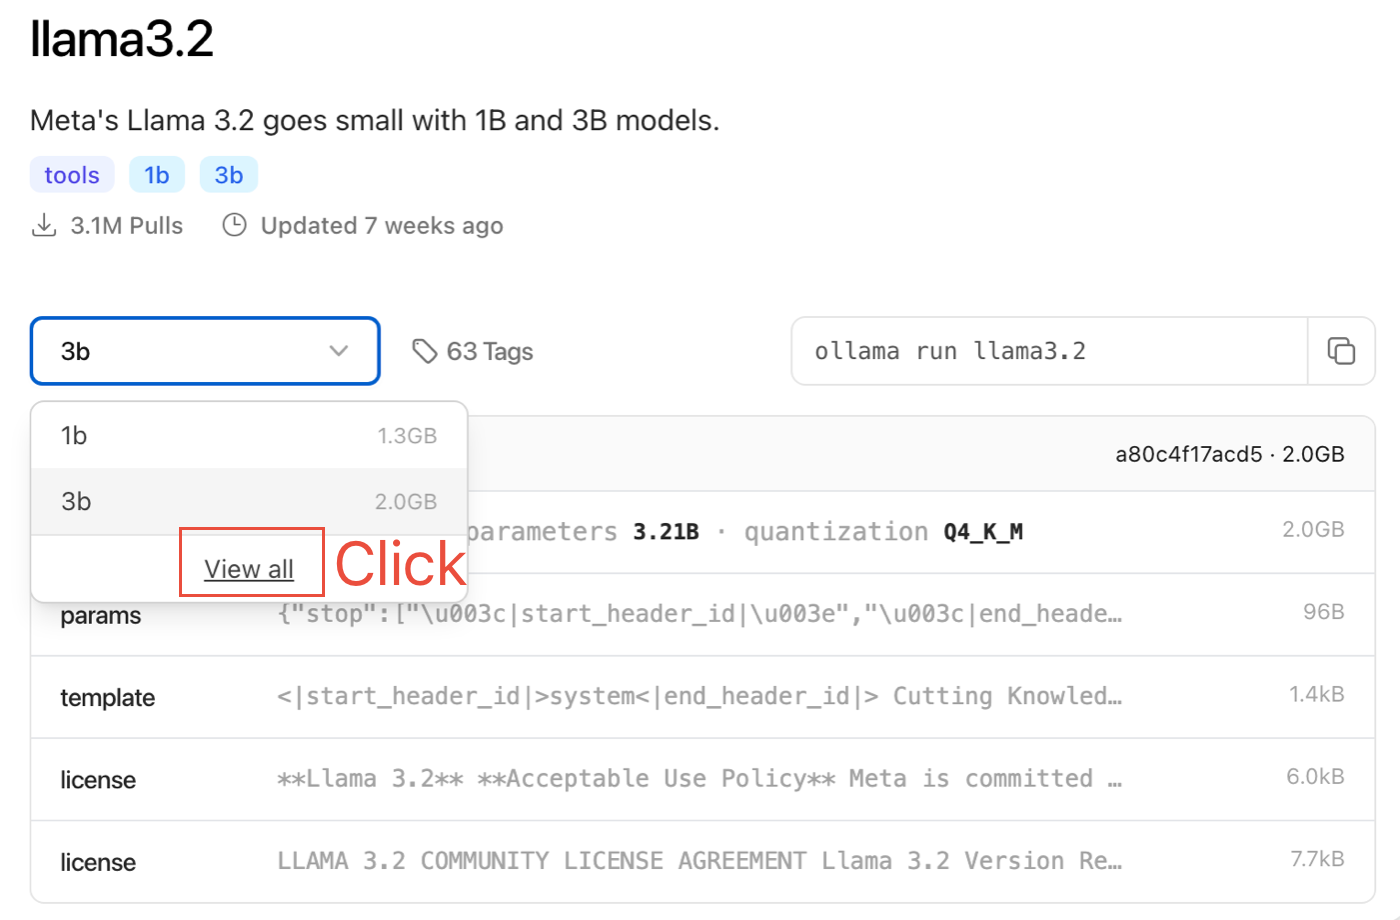
On the model page, click on “View All”, which will open the tags page for the selected model.
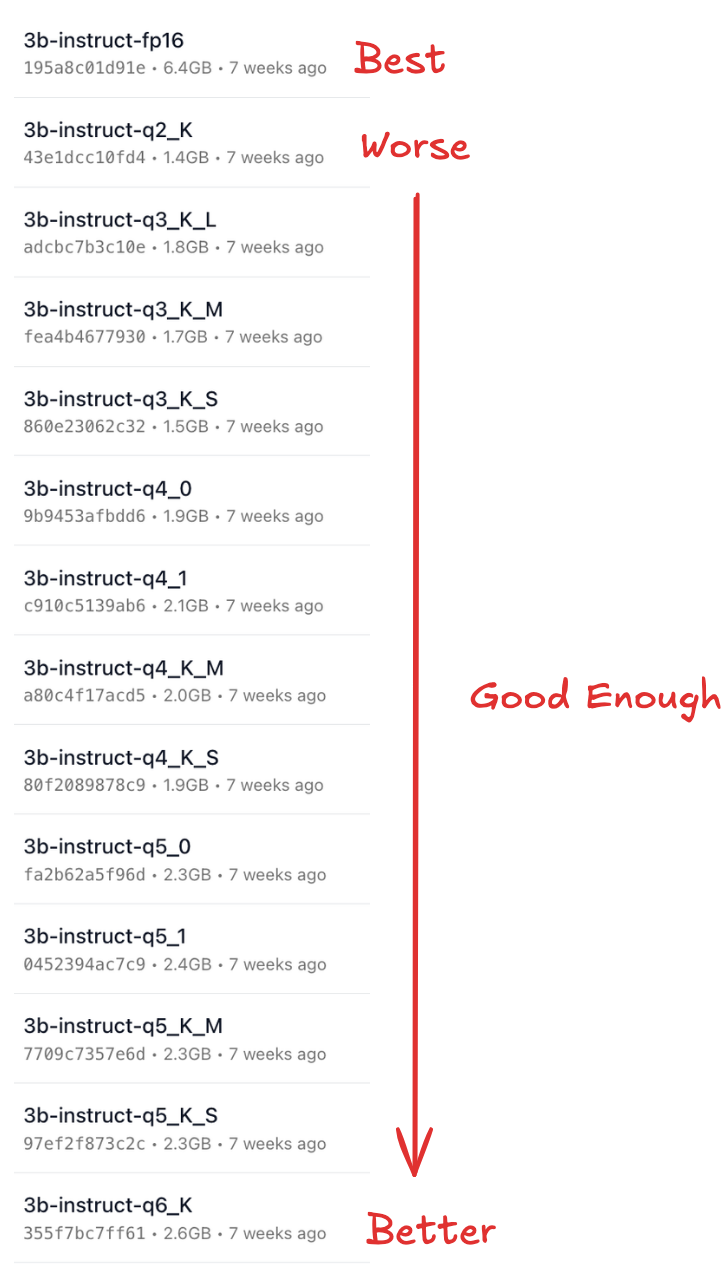
If you look at a tag name like 3b-instruct-q4_K_M, it follows this naming convention:
[Size]-[Type]-[Quantization/Precision]_[Variant]
Breaking It Down for Llama 3.2 Versions:
• Size: 1b, 3b → The higher the size (parameters), the more demanding the hardware requirements.
• Type: instruct, text → Models optimized for “instruct” perform better for tasks like summarization, Q&A, etc.
• Quantization: Q2 to Q8 → Higher values are more accurate but require more hardware. FP16 (full precision) is the most accurate but also the slowest and most hardware-intensive.
• Variant: K_L is slower than K_M.
For my hardware (MacBook Air M1, 8GB RAM), I found 3b-instruct-q4_K_M to be the best. It provided quick responses while maintaining good accuracy, making it usable for my needs.
Long story short, if your hardware can handle FP16, go for it — it offers the best accuracy. Otherwise, choose a variant that runs well on your system while meeting your use case. One thing to note is that the model size changes with precision, likely indicating a correlation. For example, the FP16 version is 6.7 GB, while the q4_K_M version is only 2 GB. This makes lower-precision models more manageable for devices with limited hardware.
Ollama API
Let’s connect to a model running in Ollama using Python by leveraging the API exposed on port 11434. To interact with the model, you send a POST request with a payload to http://localhost:11434/api/generate. Below is a simple script to make a request to the installed model:
import requests

# Define the local API endpoint
OLLAMA_URL = "http://localhost:11434/api/generate"

# Define the request payload
payload = {
    "model": "llama3.2:3b-instruct-q4_K_M",
    "prompt": "Explain the benefits of running AI models locally.",
    "system": "You are an assistant who explains concepts clearly and concisely.",
    "stream": False
}

# Make the POST request
response = requests.post(OLLAMA_URL, json=payload)

# Check response
if response.status_code == 200:
    print("Response:", response.json()["response"])
else:
    print("Error:", response.status_code, response.text)
And the response looks like this:
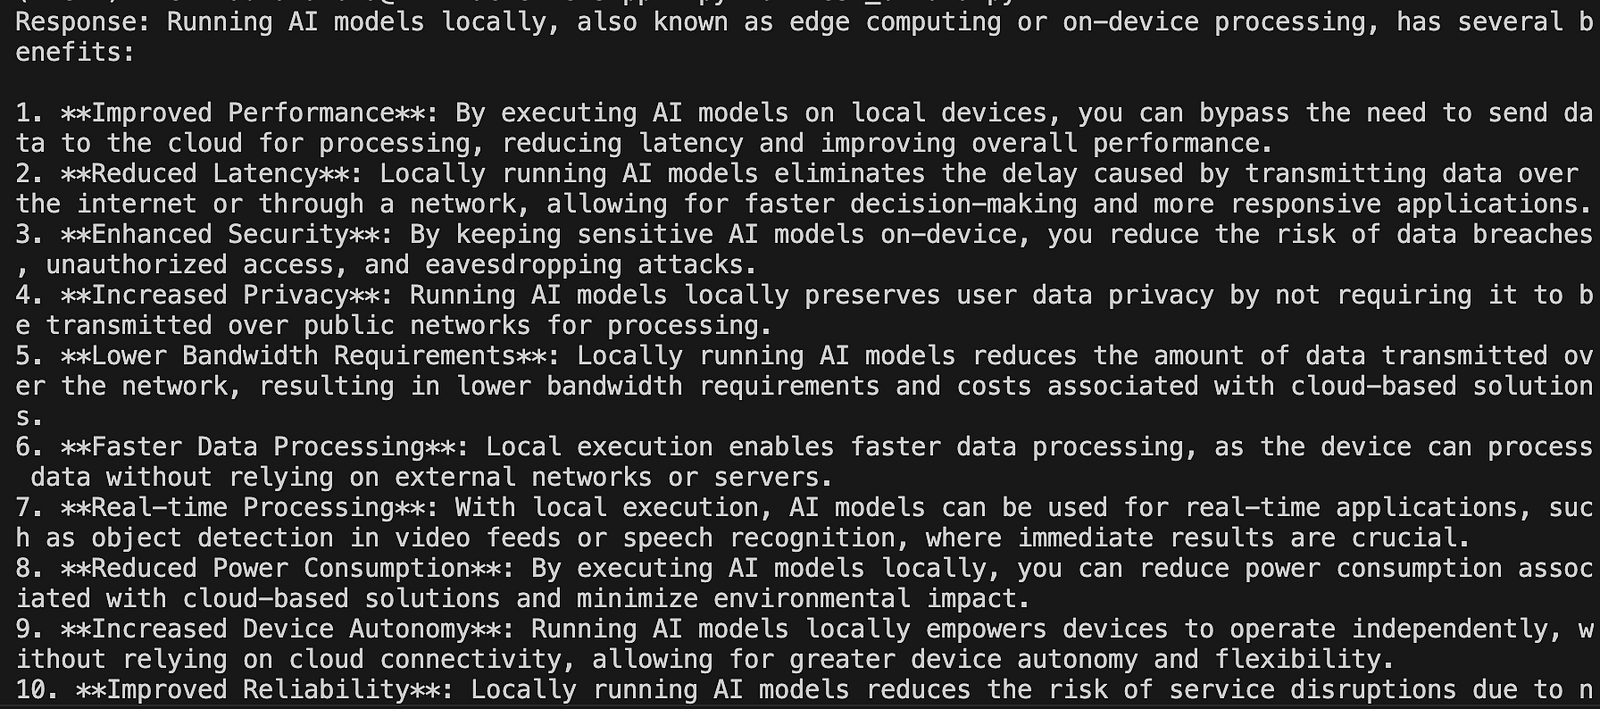
Image by Author
Conclusion
In this article we explored how we can run models, locally using Ollama, and how to call those models programmatically using Ollama API, let me know your experience in running the latest and the greatest open models, and share what would you like to build using them.
🌟 Stay Connected! 🌟
I love sharing ideas and stories here, but the conversation doesn’t have to end when the last paragraph does. Let’s keep it going!
🔹Website : https://madhavarora.net
🔹 LinkedIn for professional insights and networking: https://www.linkedin.com/in/madhav-arora-0730a718/
🔹 Twitter for daily thoughts and interactions:https://twitter.com/MadhavAror
🔹 YouTube for engaging videos and deeper dives into topics: https://www.youtube.com/@aidiscoverylab
Got questions or want to say hello? Feel free to reach out to me at madhavarorabusiness@gmail.com. I’m always open to discussions, opportunities, or just a friendly chat. Let’s make the digital world a little more connected!